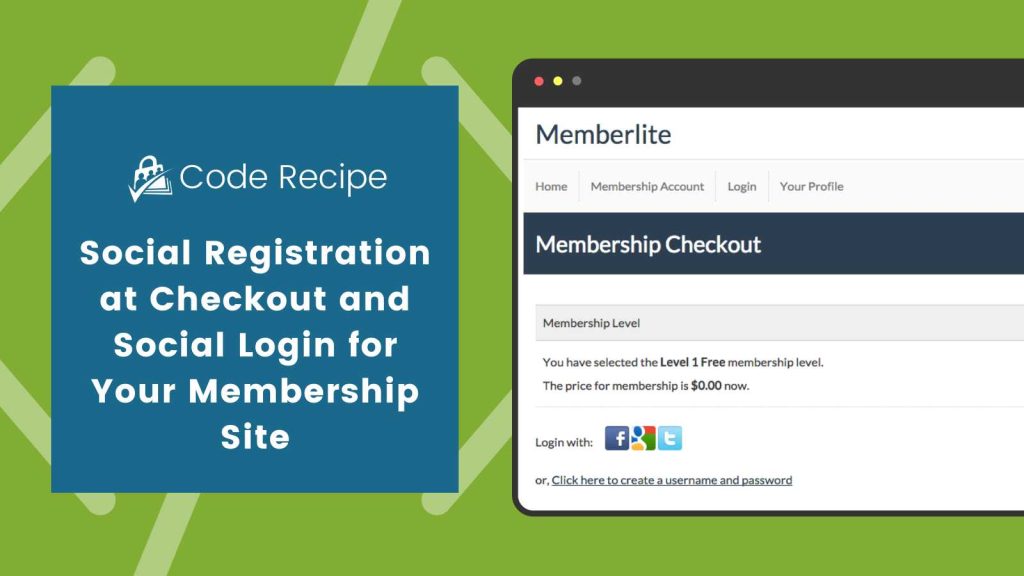
Many people ask about using social login (i.e. “Login with Facebook”) on their WordPress Membership Site. Meet our new Social Login Add On that works in conjunction with WordPress Social Login. The Add On adds the [wordpress_social_login] shortcode to Membership Checkout, with the option to manually create the user name and password.
The Workflow: For a Free Level
User selects a level from your Membership Levels page.
User is taken to the Membership Checkout page and can click an icon to “Login with” the configured social networks.
User’s membership is confirmed.
The Workflow: For a Paid Level
User selects a level from your Membership Levels page.
User is taken to the Membership Checkout page and can click an icon to “Login with” the configured social networks.
User is logged in and returned to the Membership Checkout page to complete payment information and confirm membership.
My Opinion: Social Login is Most Useful for Free Membership Levels
Adding social login to a free membership level can (when implemented correctly) make the “membership checkout” a very quick process. If your membership level requires payment, the potential member is filling out a checkout form, in most cases entering a personal credit card number. So the benefit of social login here isn’t to save time completing the form, reduce “cart abandonment” or for security. It’s more to simplify the future visit “login” experience.
One could argue that social login on your membership checkout page can hurt membership signups. What if the user clicks to login with Facebook, forgets their Facebook login information then gets caught up in the Facebook reset process or that cute video of a dog at the dinner table?
Wait, now I’m getting distracted…
Step 1: Install and Configure WordPress Social Login
I’ve tested a few social login plugins, and I find this one to be the easiest to setup, most lightweight, and simple to style/integrate in your site. [WordPress Repo] [Docs]
Go to Plugins > Add New in your WordPress admin. Search for “WordPress Social Login” and install. The plugin is written by Miled. View at the WordPress Repo
You’ll need to create “applications” in the social networks you wish to offer integration for. See below for help for a few top networks:
For Facebook
You will need an “App ID” and “App Secret” key.
- Go to: https://developers.facebook.com/apps
- Hover over the “My Apps” tab and select “Add a New App”.
- Select Website (www) as the platform.
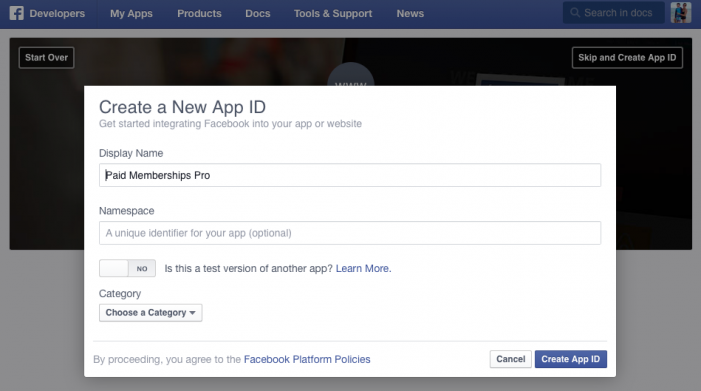
- Click “Skip and Create App App ID” in the upper right. This will bring up a box to simply enter: Display Name (I just use my website name) Don’t enter a namespace Select “No” for “Is this a test version of another app?” Choose an appropriate category Create App ID
- Display Name (I just use my website name)
- Don’t enter a namespace
- Select “No” for “Is this a test version of another app?”
- Choose an appropriate category
- Create App ID
- You’ve got an app! Click “Settings” in the left column and update your “App Domain” and “Site URL”. You can now copy and paste the “App ID” and “App Secret” keys into the Facebook section under Settings > WP Social Login in your WordPress site admin.
For Twitter / X
You will need an “Application Key” and “Application Secret”.
- Go to https://developer.twitter.com/en/apps
- Click “Create New App”.
- Under “Application Details” complete the fields for Name, Description and Website. (Note: Make sure that your Twitter account has a verified mobile number before completing this step. You can add your mobile number via Settings > Phone here.)
- For the “Callback URL”, you need to enter the URL as provided in the Settings > WP Social Login > Twitter admin screen. The URL will look something like this:
https://www.YOURDOMAIN.com/wp-content/plugins/wordpress-social-login/hybridauth/?hauth.done=Twitter - Thats (technically) it. For completeness, I did go back to the “Settings” tab in the Application Management section to update my “Application Icon” and Organization information.
- Click the “Keys and Access Tokens” tab and locate the “Consumer Key (API Key)” and “Consumer Secret (API Secret)” values, which you can enter into the “Application Key” and “Application Secret” fields under Settings > WP Social Login > Twitter in your WordPress site admin.
For LinkedIn
You will need a “Client Key” (Application Key) and “Client Secret” (Application Secret).
- Go to https://www.linkedin.com/secure/developer
- Click “Create Application”.
- Complete all required fields (Company Name, Application Name, Description, Application Logo URL, Application Use, Website URL, Business Email and Business Phone.
- Read and agree to the API Terms of Use then click “Submit”.
- Navigate to “Settings” in the left column, and update your “Application Status” to “Live”. Click “Update”.
- That’s it – LinkedIn will provide you with the “Client ID” and “Client Secret” on the “Authentication” menu page, which you can enter into the “Application ID” and “Application Secret” fields under Settings > WP Social Login > LinkedIn in your WordPress site admin.
For Google
You will need a “Client ID” and “Client secret” key.
- Go to https://console.developers.google.com/project
- Click “Create Project”.
- Enter the “Project Name” (I just use my website name) and click “Create”.
- Navigate to “APIs & auth” > “APIs” in the left column, then click on “Google+ API” (under Social APIs heading) and click “Enable API”.
- Next, set up your “OAuth Consent Screen” under “APIs and auth” > “Credentials”. Google will ask for some required and optional information to display on the authorization screen your users will see as part of Social Login via Google.
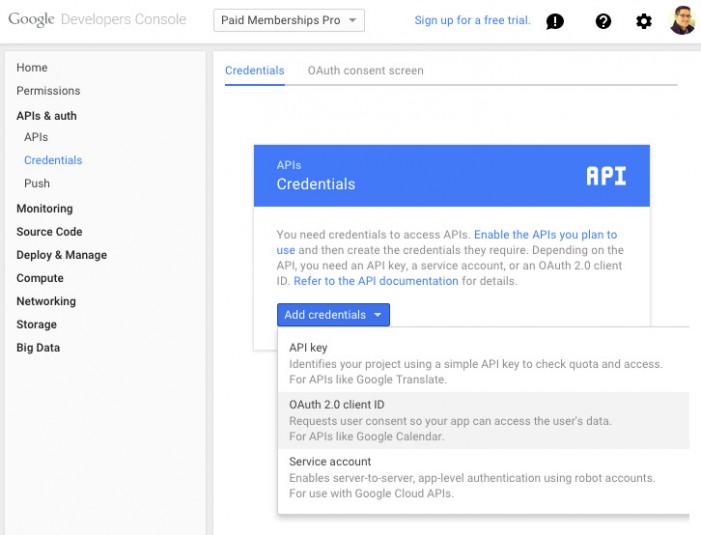
- After saving your Consent Screen, navigate to “APIs and auth” > “Credentials”, then click on “Add credentials” > “OAuth 2.0 client ID”.
- Select “Web application” as your application type.
- Enter the URL of your site under “Authorized JavaScript origins”. You may want to enter both the www and non-www version of your domain (i.e.
https://www.paidmembershipspro.comandhttps://paidmembershipspro.com). - Under “Authorized redirect URLs” you need to enter the URL as provided in the Settings > WP Social Login > Google admin screen. The URL will look something like this:
https://www.YOURDOMAIN.com/wp-content/plugins/wordpress-social-login/hybridauth/?hauth.done=Google - That’s it – Google will provide you with the “client ID” and “client secret” which you can enter into the “Application ID” and “Application Secret” fields under Settings > WP Social Login > Google in your WordPress site admin.
Step 2: Install and Configure the Social Login Add On
PMPro Plus members can download the add on .zip here and install manually via the Plugins > Add New > Upload admin page.
Or, go to Memberships > Add Ons in your WordPress admin, click the “Check Now” button, then locate “Social Login” in that list.
By default, all levels will show the Social Login option, but you can choose to hide social login for a specific level on the Memberships > Membership Levels > Edit Level admin page.

What if a non-member uses Social Login via your Login page?
If you have set your WordPress Social Login Widget Advanced Settings > “Widget display” to show on the login form, it is possible for non-users/non-members to create accounts on your site.
To give these users a default membership level (i.e. a Free level like on our site), you can set the default level on the Memberships > Membership Levels > Edit Level admin page. Only one level can be set as default at a time.
Step 3: Additional Settings for WordPress Social Login (Optional)
For my setup, I updated the “Widget” tab with a few additional settings:
- I set the “Connect with caption:” to say “Login with:”.
- I removed the “Redirect URL”, set “Force Redirection” to “No” and set “Authentication display” to “Popup”.
If you’re using Memberlite, you can also use this CSS in the “Custom CSS” box:
https://gist.github.com/strangerstudios/04bff9a1a11c86b785d3
If you have a different view of how you’d like social login on your membership site, hopefully this tutorial can provide some direction as you implement.

