On This Page:
- Different Methods for Exporting and Importing in WordPress
- Required Plugins
- 1. Choose Supported WordPress Export and Import Tools or Plugins
- 2. Install WPML Export and Import on Your Export and Import Websites
- 3. Export Your Multilingual Content
- 4. Import Your Multilingual Content
- 5. Run WPML Export and Import
- Known Issues
Different Methods for Exporting and Importing in WordPress
In WordPress, there are two main ways to import content to a new site:
- Using an export and import tool or plugin to move content from one WordPress site to another
- Creating a custom spreadsheet with content and using an import tool or plugin to transfer it to a new site
WPML Export and Import supports both of these workflows but the way you use it depends on your specific import process.
- Moving content from one site to another? Continue on this page to learn about choosing supported export and import plugins and the steps involved in moving your multilingual content.
- Importing multilingual content from a spreadsheet? See how to prepare your CSV or XML files and run the multilingual data import with WPML Export and Import.
Required Plugins
WPML Export and Import comes with the Multilingual CMS and Multilingual Agency account types. If you’re already a client, you can get the plugin from the WPML’s downloads page. If not, start by buying WPML.
When you’re ready to transfer your multilingual content, install and activate these plugins both on the site you’re exporting from and importing to:
- Your preferred WordPress import plugin or tool
- WPML core plugin and WPML String Translation
- WPML Export and Import add-on
- WooCommerce Multilingual and Multicurrency (only if you’re exporting and importing WooCommerce products)
1. Choose Supported WordPress Export and Import Tools or Plugins
While WordPress export and import plugins make it easy to move your data from one site to another, they don’t have the ability to assign correct languages to content or to reconnect translations on your new site.
For example, let’s say you have a WooCommerce store translated with WPML’s WooCommerce Multilingual and Multicurrency. Your products, their descriptions, and attributes are available in English and Spanish. You decide to move your store to a new site using export and import tools. The result? On your new site, all products are displayed under English including Spanish translations.
WPML Export and Import resolves this challenge. It fully supports many common export/import plugins and there’s no need for extra steps in your import plugin.
Here’s how WPML Export and Import works with these supported plugins and tools:
- Automatically adds language information to exports created by the supported plugins
- Keeps the imported content hidden from the front-end until it can connect the translations
- It assigns the right language to the imported content and links translations together
Supported Export and Import Plugins and Tools
Built-in WordPress export tool and the official WordPress Importer plugin
WooCommerce built-in product CSV Importer and Exporter
Using a plugin that’s not listed? See how to add language information to the CSV or XML file.
2. Install WPML Export and Import on Your Export and Import Websites
For WPML Export and Import to work its magic, you need to install and activate it on both sites – the site you’re exporting from and importing to. If you are moving from one WooCommerce site to another, make sure to install WooCommerce Multilingual & Multicurrency on both sites as well.
3. Export Your Multilingual Content
After installing the necessary plugins, you can start exporting your multilingual content. WPML Export and Import supports your preferred plugin’s workflow:
- You can export all multilingual site content in one file or generate separate files for each language.
- If you’re exporting both categories and posts, use a plugin like WP All Export to generate separate export files for your taxonomies and post types.
- You can use a tool like the built-in WooCommerce exporter to export all products in all languages in one file.
Example Scenario: Using the Built-in WooCommerce Exporter
For example, here’s how you export a multilingual WooCommerce site in one file using the built-in WooCommerce exporter:
- From your site’s dashboard, go to Products and click the Export button.
- Use the language switcher at the top of the page to switch to All languages. This allows you to generate a file with the products in all languages.
- Click the Generate CSV button.
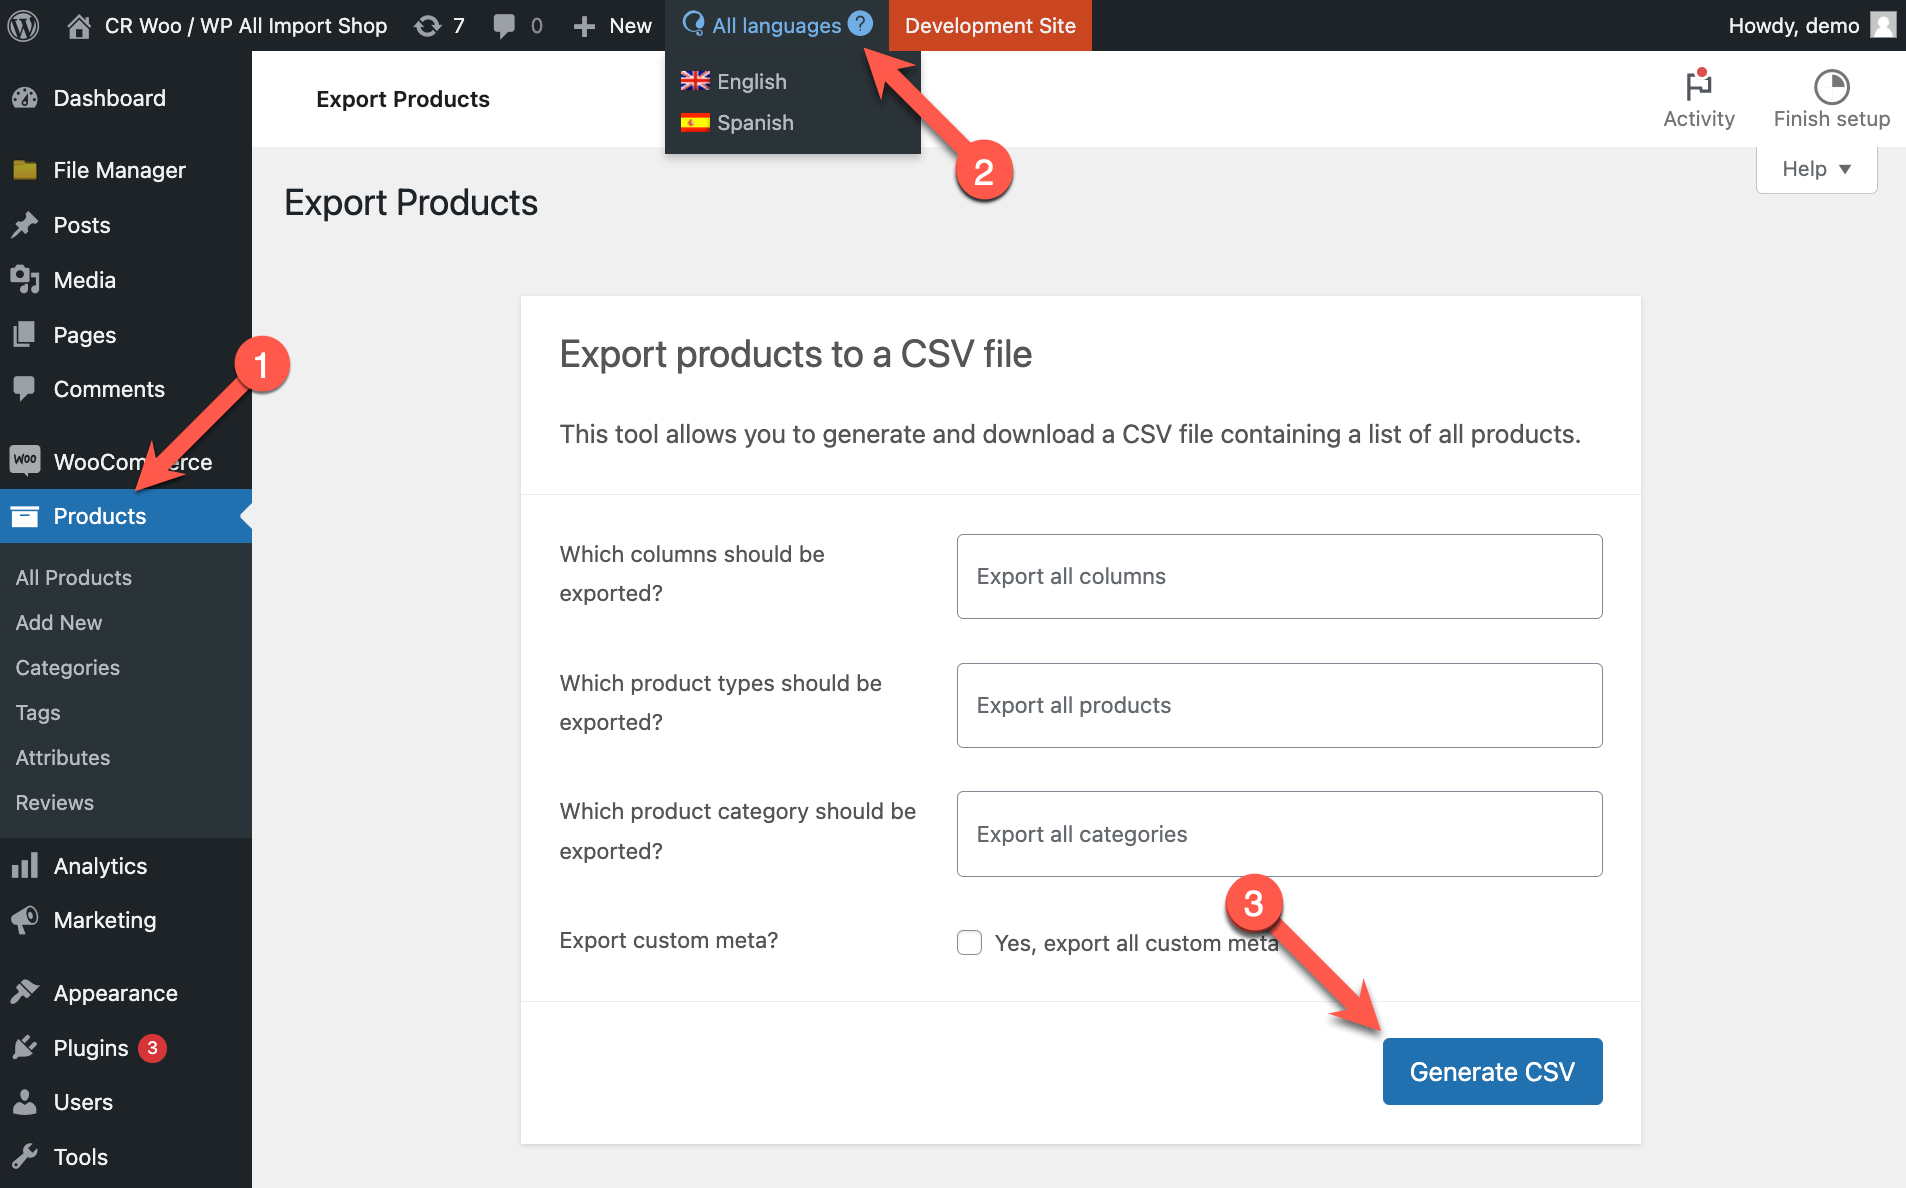
The CSV file includes all products and necessary language information for WPML Export and Import to later assign languages to your content and connect translations.
4. Import Your Multilingual Content
On your new site, choose the import workflow based on how you exported your content and the import tool you are using:
- If you have separate export files for categories, tags, or any other taxonomies and post types, import the taxonomies first. Then, import the posts.
- If you created separate export files for each language, import each file before running WPML Export and Import.
Until you run WPML Export and Import, all your imported content will be grouped under the default language. For supported import plugins, WPML Export and Import temporarily sets content to Draft status so visitors don’t see mixed languages on the front-end.
Learn more about how WPML Export and Import manages the visibility of imported content.
Example Scenario: Using the Built-in WooCommerce Importer
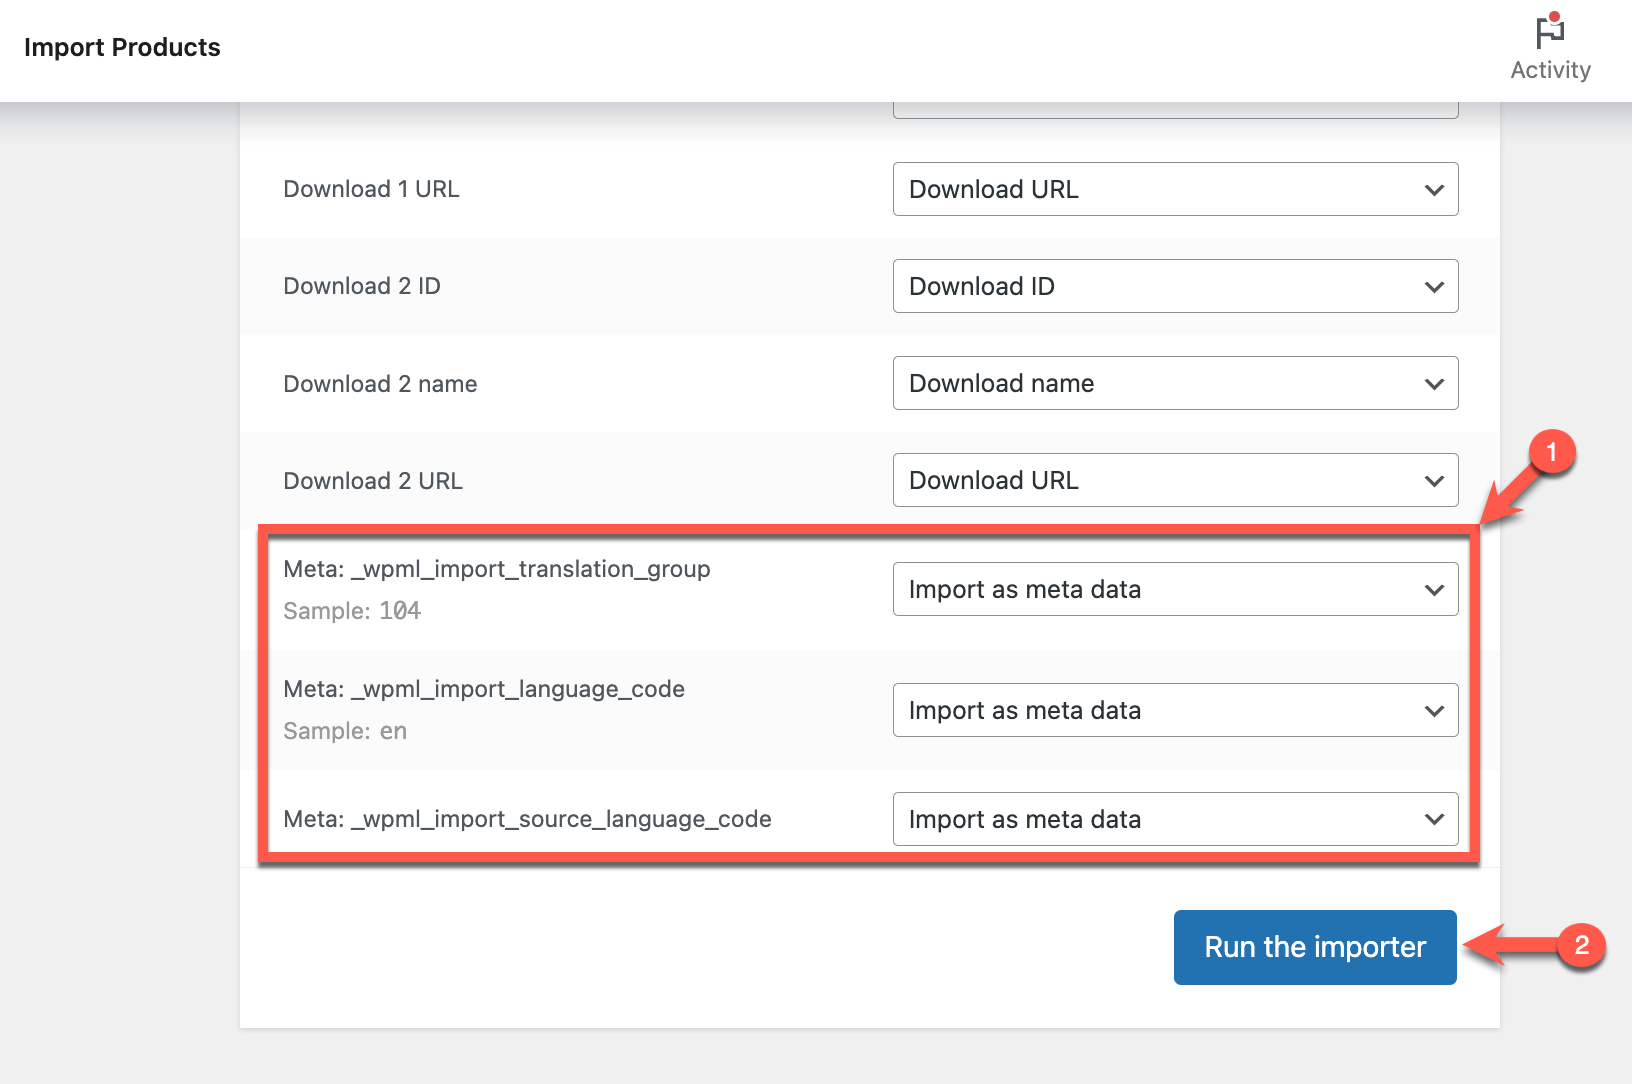
Following our export example, here’s what the import process looks like using the built-in WooCommerce importer:
- On your new site, go to Products and click the Start Import button.
- Upload the CSV file you generated in the previous step and click Continue.
- Confirm that all your CSV fields are mapped to products. At the bottom of the screen, you should see the language information automatically added by WPML Export and Import labeled as Import as meta data. Click Run the importer.
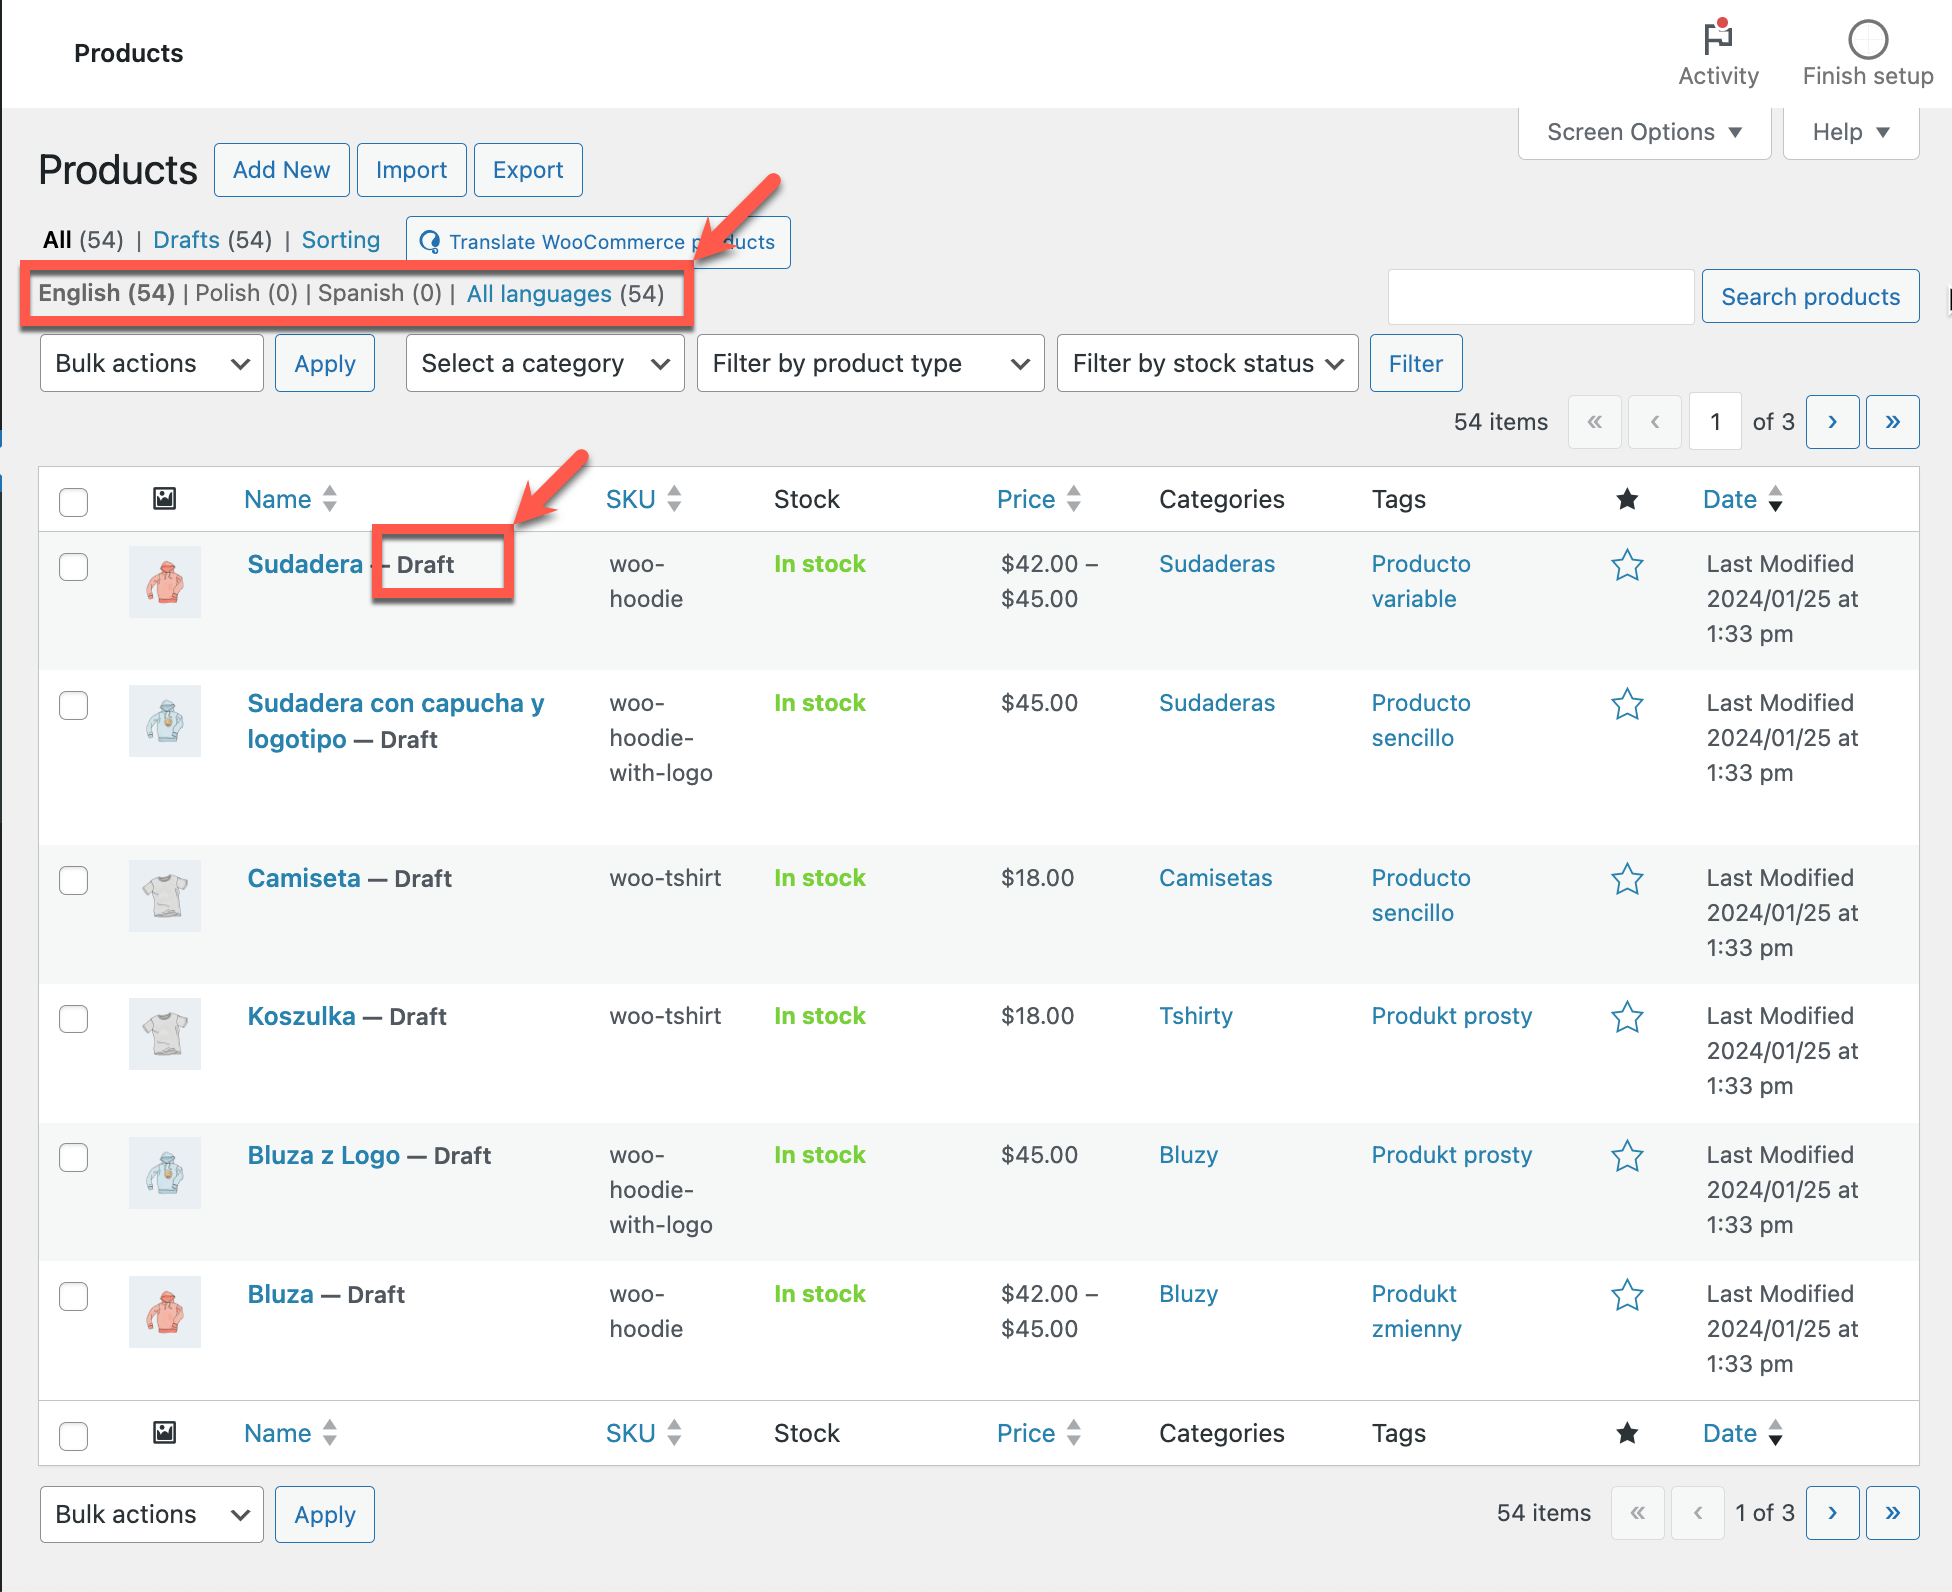
Once the import completes, view your products. You won’t see your content assigned to the right language on the backend of your site. You’ll also see all your products in the Draft status. This is expected, as you still need to run WPML Export and Import to adjust all the multilingual information.
5. Run WPML Export and Import
Now that you’ve imported your multilingual content, you can let WPML Export and Import update the language information.
- Go to WPML → Export and Import.
- If your imported content has been correctly imported, you’ll see a button titled Run WPML Import. Click on the button and let WPML Export and Import automatically go through the steps.
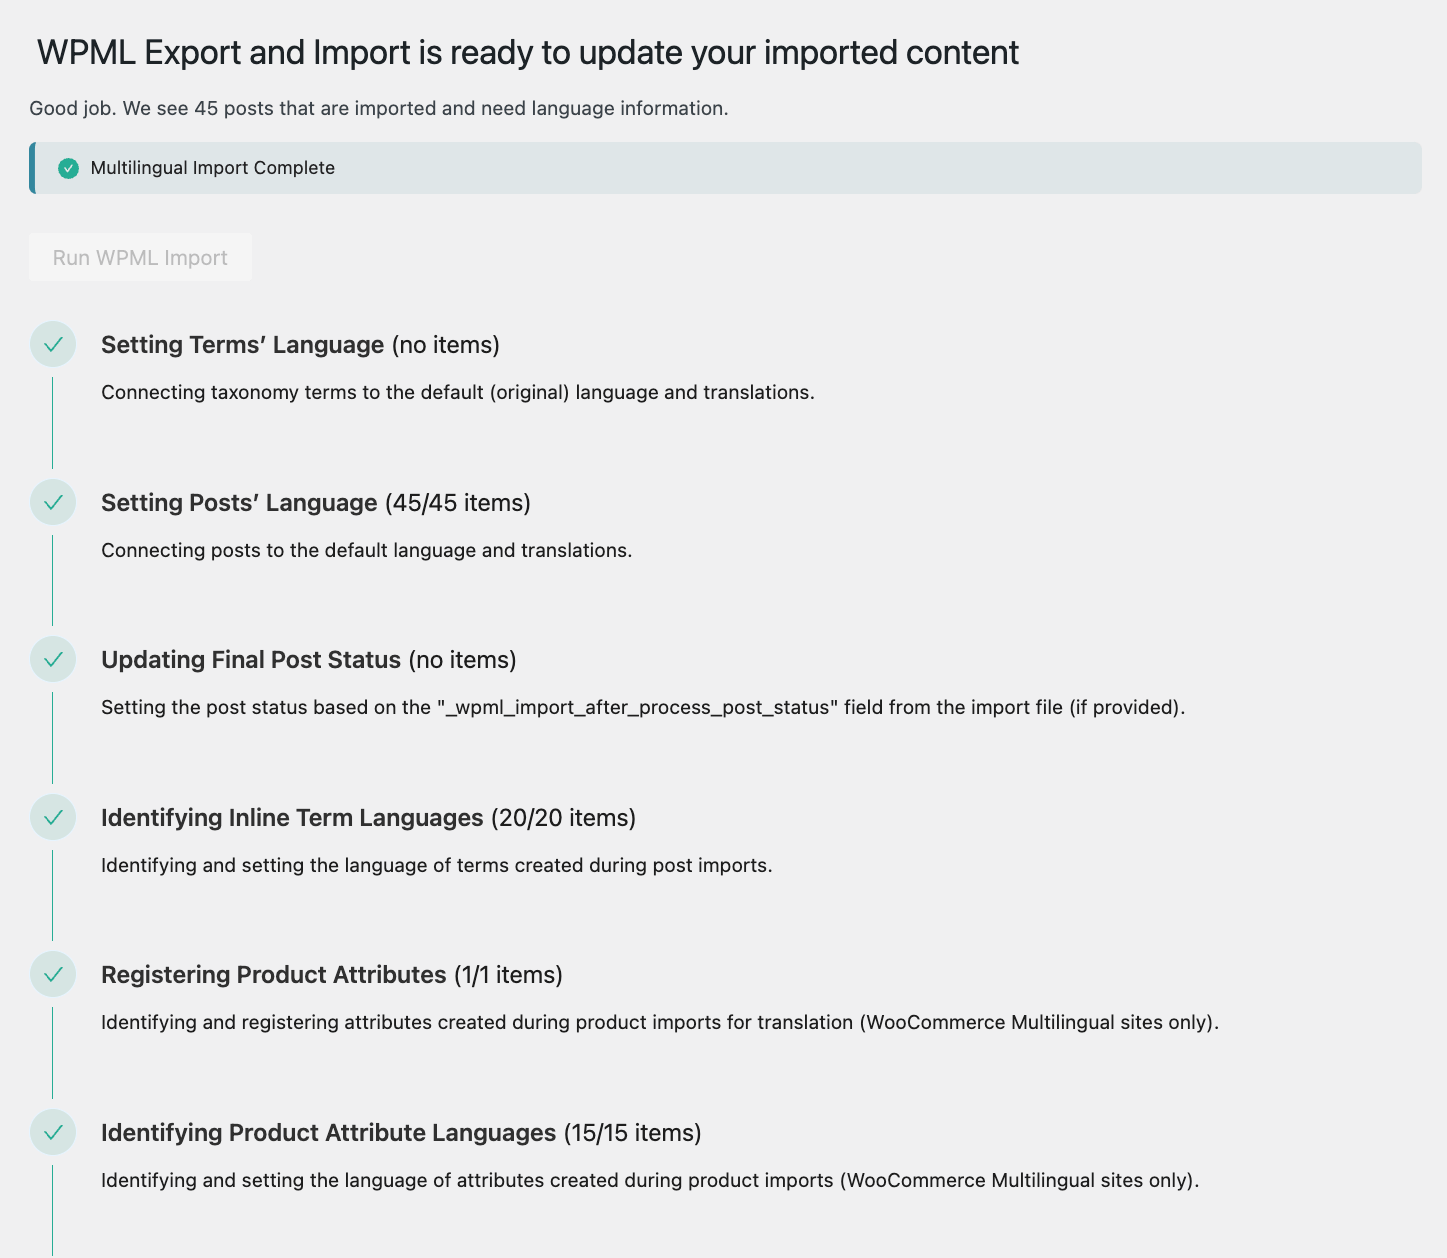
Once WPML Export and Import finishes updating your imported content, check your posts, pages, products, and taxonomies on both the backend and front-end. Ensure that your content displays under the correct language and links to translations.
If any taxonomy translation appears to be missing or disconnected from the default language term, you need to manually connect the taxonomy translations.
Published posts with assigned languages on the backend after running WPML Export and Import
Translated and connected products on the front-end after running WPML Export and Import