Are you looking to enhance your customer engagement with attractive discount options? With the WPForms Coupons addon, you can create personalized or automatically generated coupon codes directly from your WordPress dashboard.
This tutorial will show you how to install and use the Coupons addon with WPForms.
Requirements:
- You’ll need a Pro license level or higher to access the Coupons addon.
- Ensure that you’ve installed the latest version of WPForms to meet the minimum required version for the Coupons addon.
Installing the Coupons Addon
Before you dive into the tutorial, be sure to install and activate the WPForms plugin on your WordPress site.
Once you’ve installed WPForms and verified your license, you’ll be able to quickly install and activate the Coupons addon.
After activating the addon, you can configure it by going to WPForms » Payments and selecting the Coupons tab.
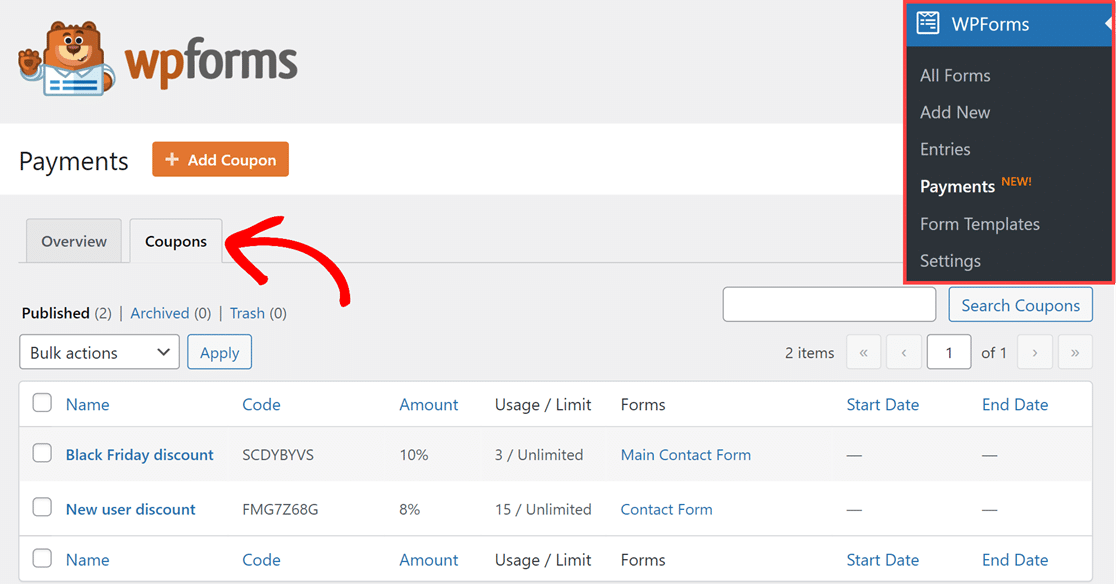
Creating a New Coupon
To get started, click on the + Add Coupon button in the Coupons tab of the Payments page.
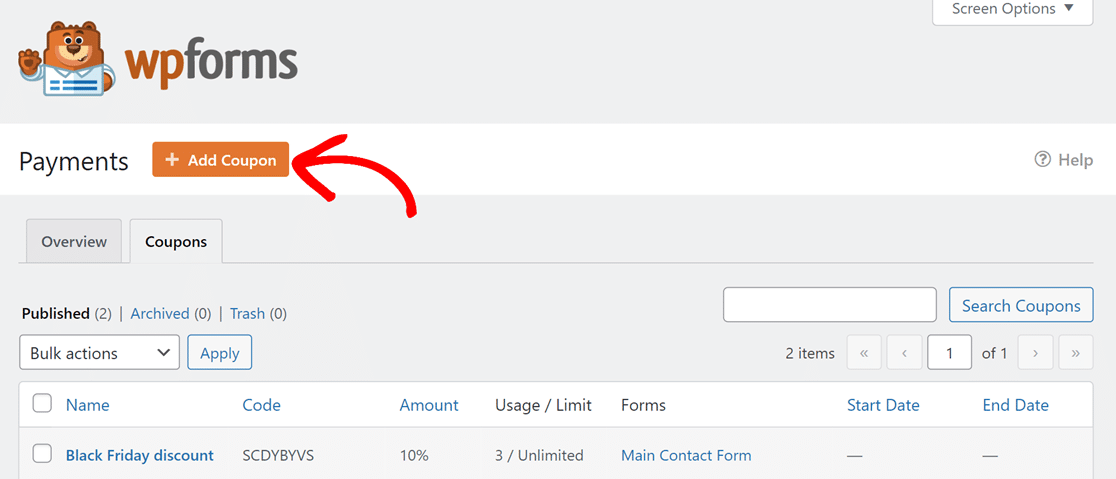
This takes you to the Add New Coupon page.
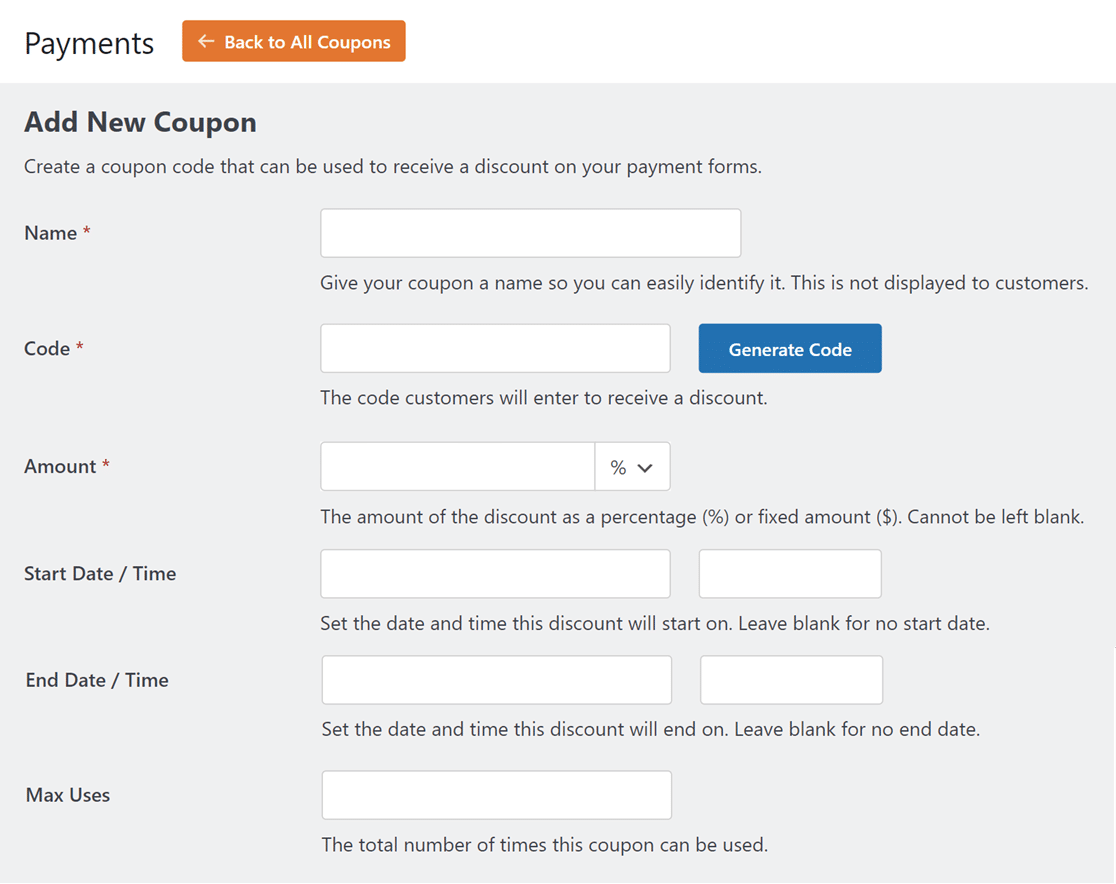
Here are all the fields you can fill out on this page:
Note: Required fields are marked with an asterisk (*).
- Name*: Give your coupon a title for easy identification. This won’t be visible to customers.
- Code*: Set the coupon code for customers to use for discounts. You can create your own or click the Generate Code button for a random coupon code.
- Amount*: Choose the discount your coupon offers. It could be a percentage or a fixed amount. To switch between both options, click the dropdown next to the Amount field and choose the one you’d like to use.
- Start Date / Time: Determine when the coupon starts being active.
- End Date / Time: Choose when the coupon will no longer be valid.
- Max Uses: Set the total number of times the coupon can be used before it’s invalid.
Note:
- You won’t be able to modify the Code and Amount fields after saving your coupon. We recommend double-checking these fields before proceeding.
- The Amount field currency defaults to the currency specified in your WPForms settings page. You can change it anytime by going to WPForms » Settings and selecting the Payments tab. Then click the Currency dropdown and choose your preferred currency.
When creating your coupon, you can leave the Start Date, End Date, and Max Uses fields empty. However, if you do, there won’t be any limits set for the coupon code’s usage. For example, the coupon will remain valid indefinitely if the End Date field is blank.
Mapping Coupons to Forms (Optional)
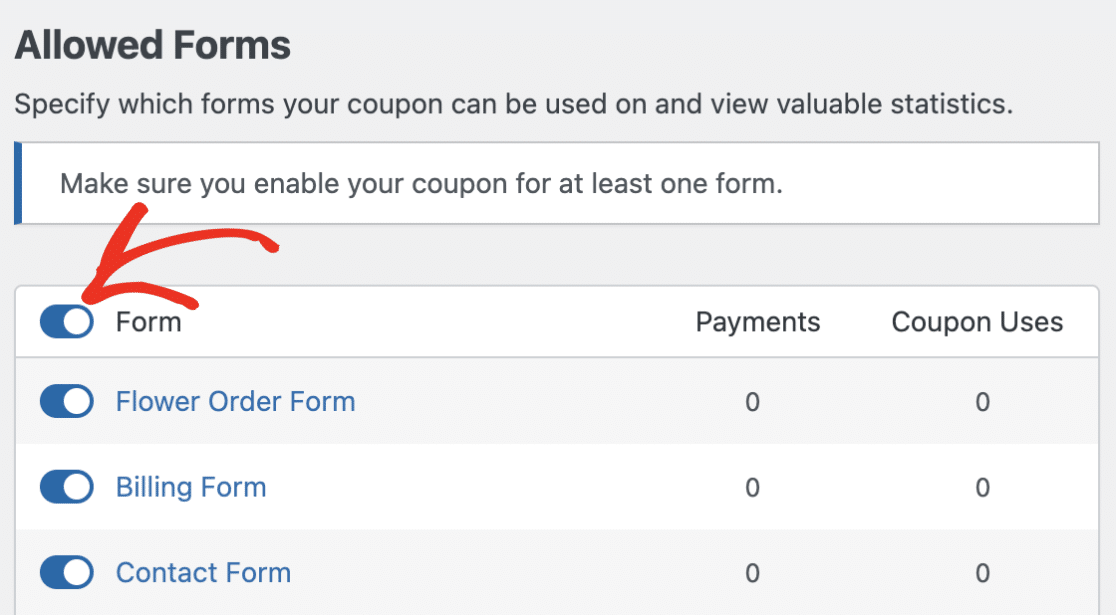
Next, you have the option to associate your coupon with specific forms. Scroll down to the Allowed Forms section and switch the toggle button next to the particular form where you want your coupon to be applicable.
Note: Connecting the coupon to a form at this stage is optional. If the form you want your coupon to be used in does not exist yet, you can always connect them later in the form builder via the Coupon field options.
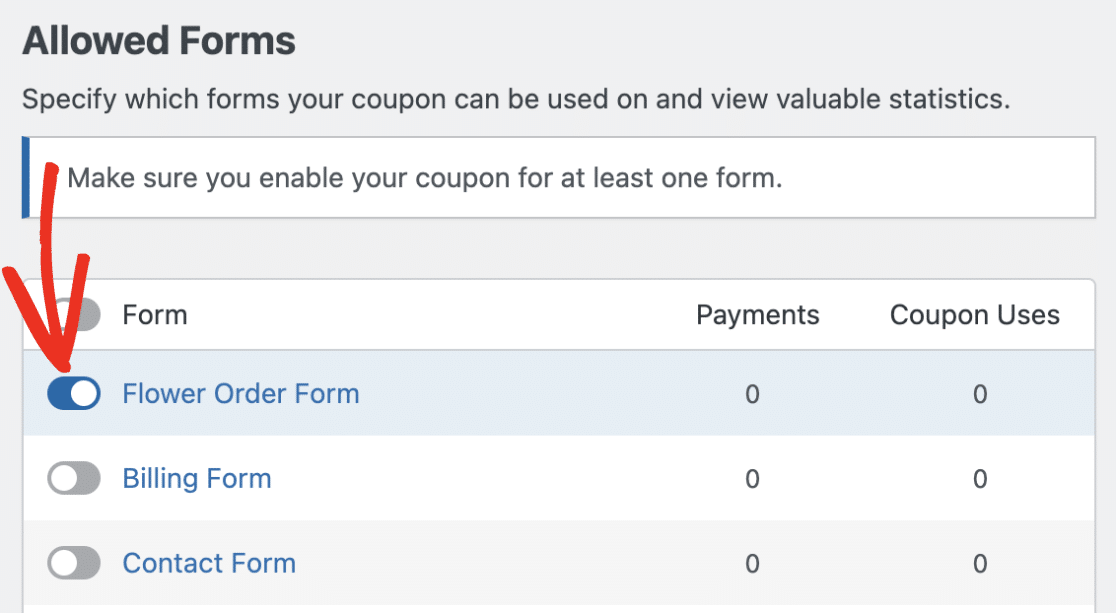
You can also apply the coupon to all forms. This can be done by clicking the toggle button next to the Form column.
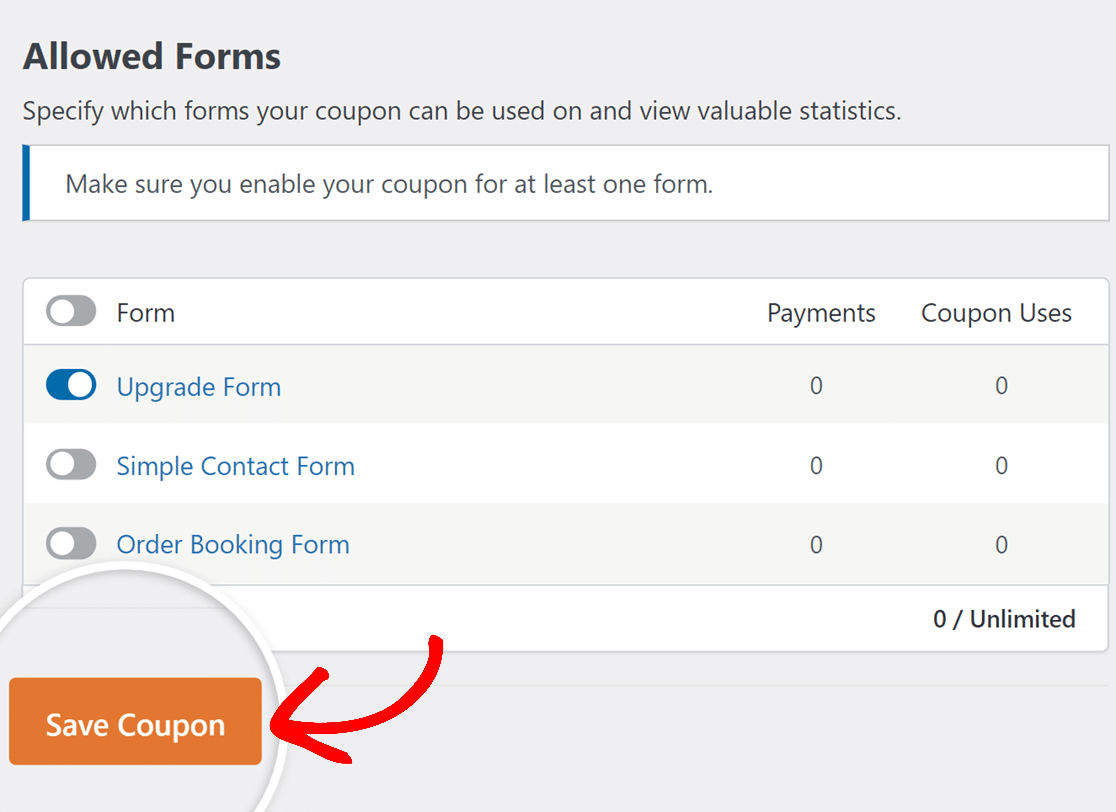
When you’re happy with your settings, click the Save Coupon button to save the coupon.
Adding Coupons to Your Forms
For customers to use your coupon code, you’ll need to add the Coupon field to your form and choose the coupons you’d like to allow.
Note: To quickly implement these settings and see how a coupon-enabled form looks, you can start with our pre-built Coupon Form Template as a foundation for your own customized form.
Start by creating a new form or editing an existing one. Once you’re in the form builder, look for the Coupon field under the Payment Fields section and add it to your form.
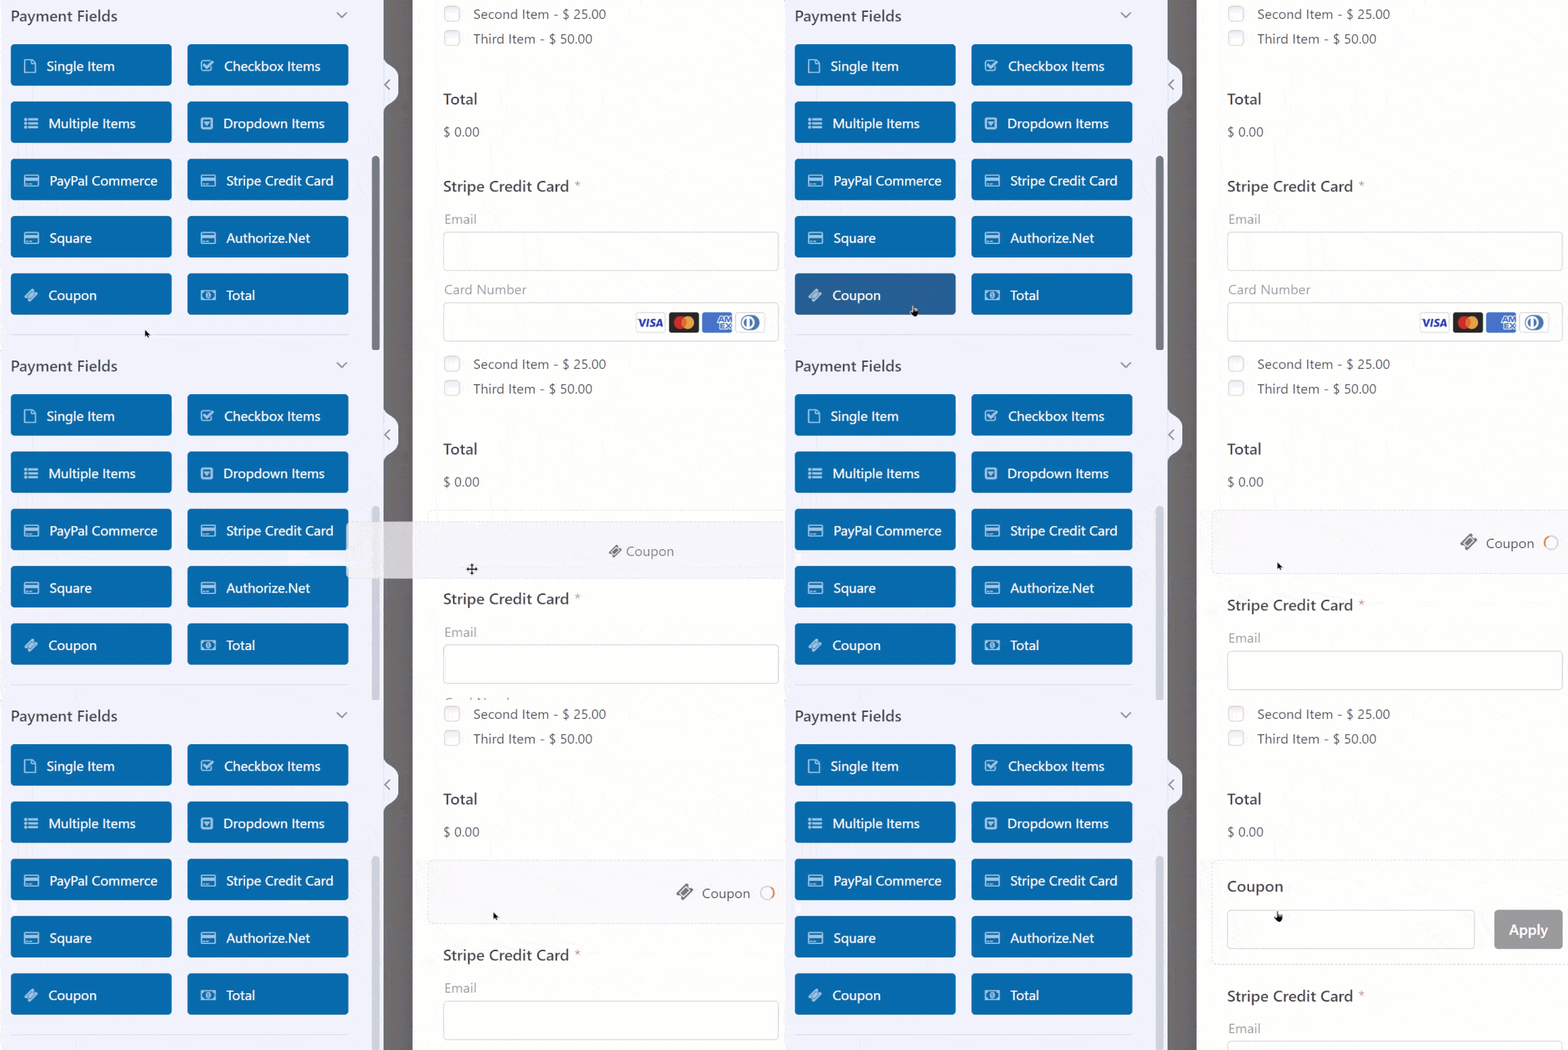
Note: Only one Coupon field can be added to a form.
Next, click on the added Coupon field from the preview panel to open its Field Options.
Under the General tab, click the Allowed Coupons dropdown and select the coupon(s) you wish to allow on this form.
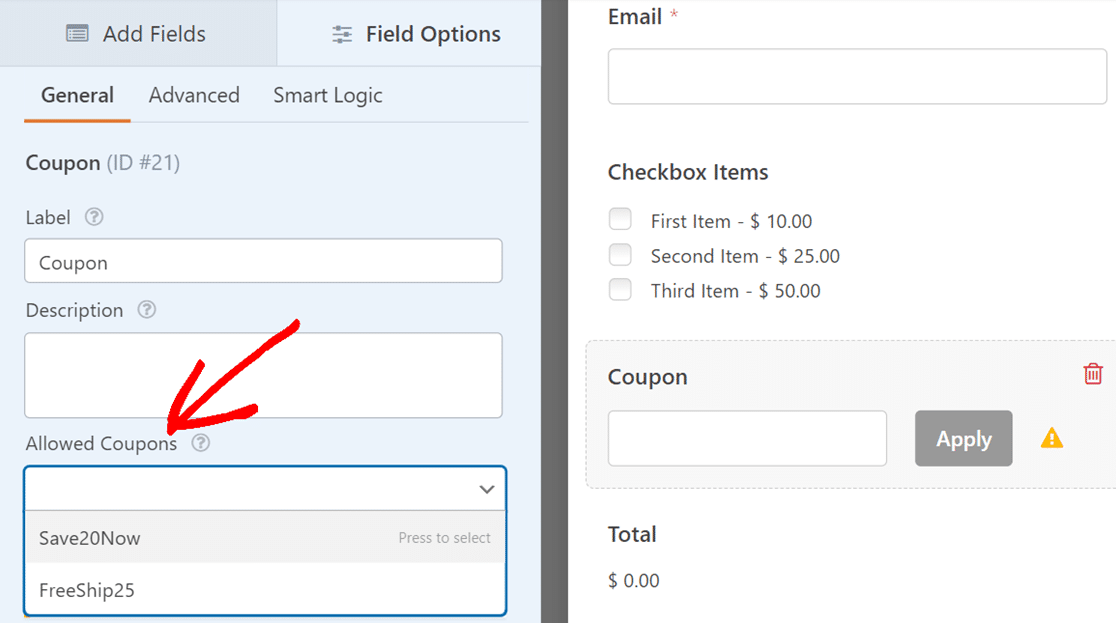
You can allow multiple coupons on a single form. However, users can only apply one of the allowed coupons for a discount when filling out your form.
Note: The coupon(s) you choose to allow here will automatically be linked to this form on the Coupon settings page. This means that the toggle button for this form will be enabled in the Allowed Forms section when editing the coupon(s) you allow on this form.
If you’d like to change the text on the Apply button, select the Advanced tab. Then update the text in the Button Text field.
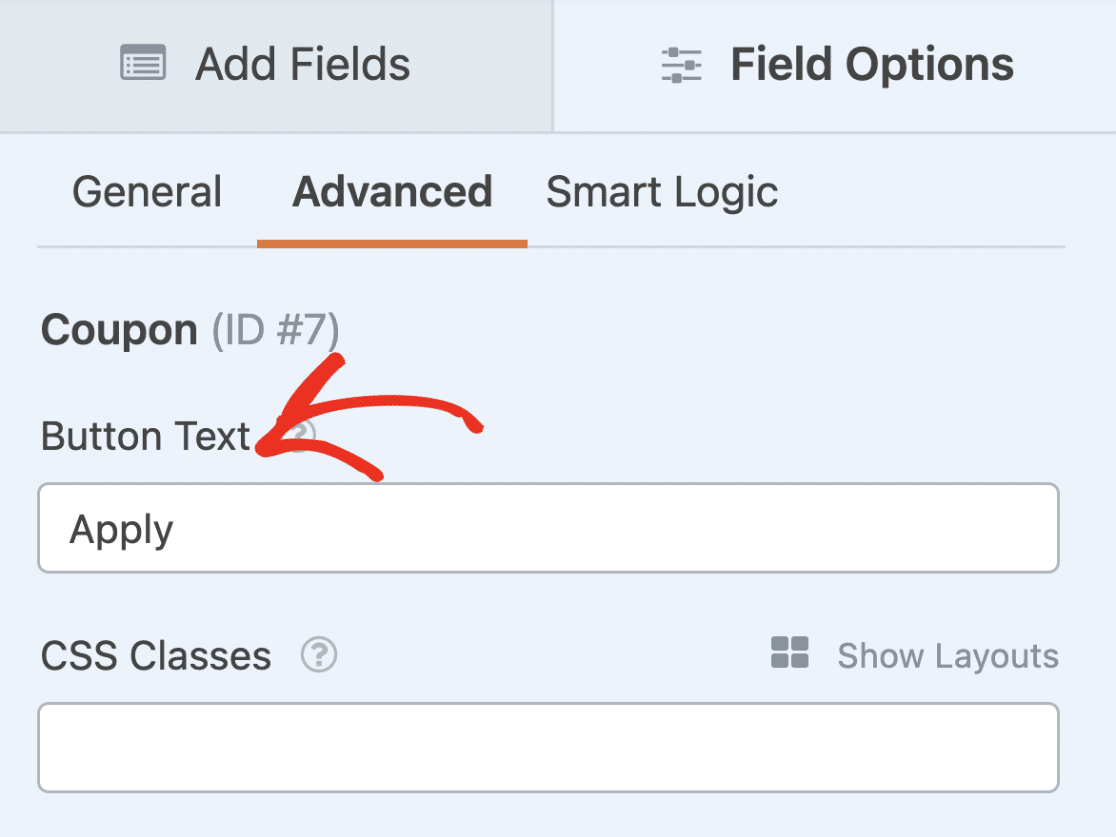
Note: The Field Options panel provides customization options like changing field labels or enabling conditional logic. To add a custom placeholder to the Coupon field, visit our developer documentation. For more on field options, see our field options customization guide.
Don’t forget to save your form after customizing the Coupon field.
Note: After saving your form, be sure to test it out before launching it to your users. For a detailed guide, please refer to our form testing checklist guide.
Frequently Asked Questions
These are answers to some top questions about using the Coupons addon with WPForms.
How do I allow users to submit the form when a 100% off discount is applied?
By default, if a user applies a coupon code that offers a 100% discount, the form won’t submit. Users will likely see an error similar to the one in the image below.
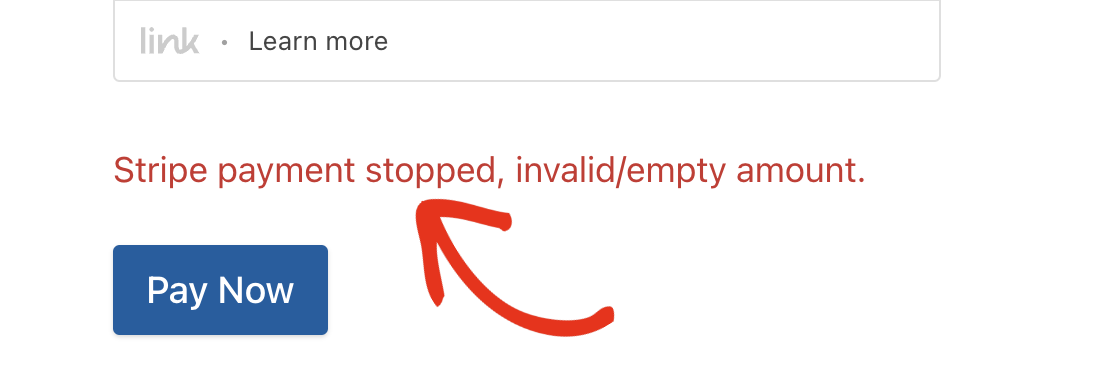
This occurs because most payment gateways can’t process a form with 0 value as the payment amount.
A quick workaround for this is to use conditional logic to prevent the form from processing the payment if the Total field’s value is 0.
To set this up, log in to your WordPress admin area and open the payment form you wish to enable 100% discount on.
Note: For this example, we’ll use the Stripe Pro addon. But this solution also works with all our other payment addons.
In the form builder, go to Payments » Stripe to access the Stripe settings page.
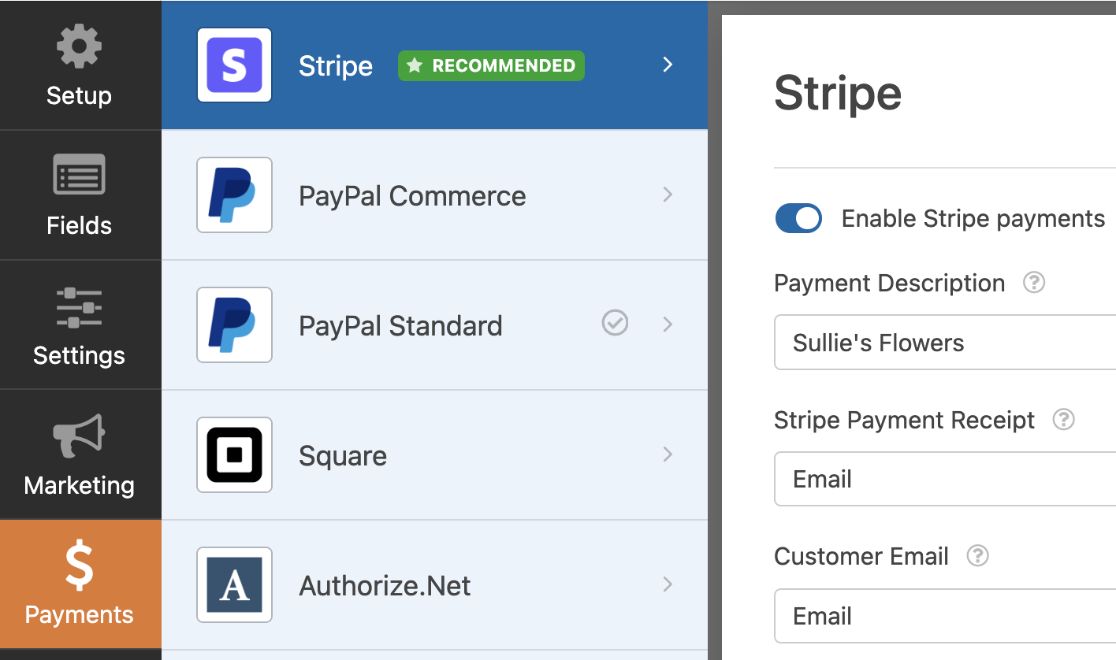
Next, scroll down and toggle on the Enable Conditional Logic option.
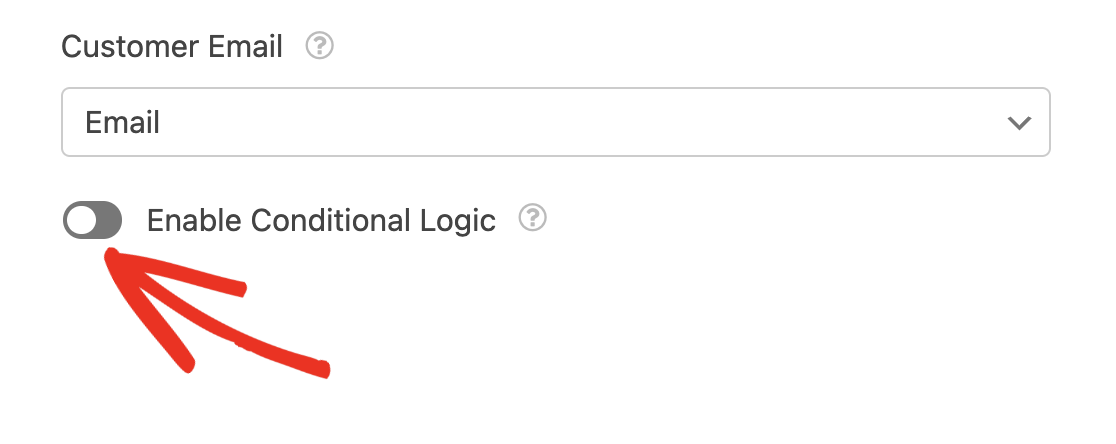
After that, set the condition to say: Don’t process this charge if the Coupon field is JULY100OFF.
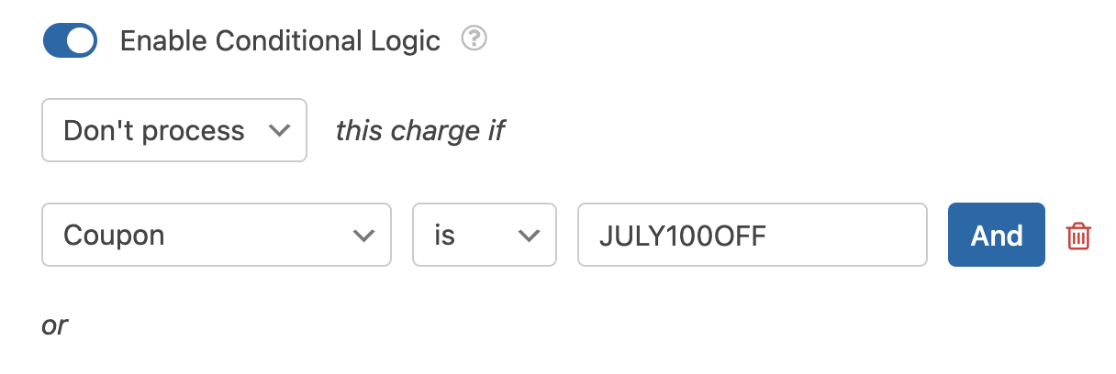
This logic will essentially prevent the payment from processing if the coupon code matches the one in the conditional logic rule.
Note: Be sure to replace JULY100OFF with the coupon code you intend using to offer users 100% discount.
After setting the conditional logic rule, return to the fields tab and select the payment field to open its Field Options.
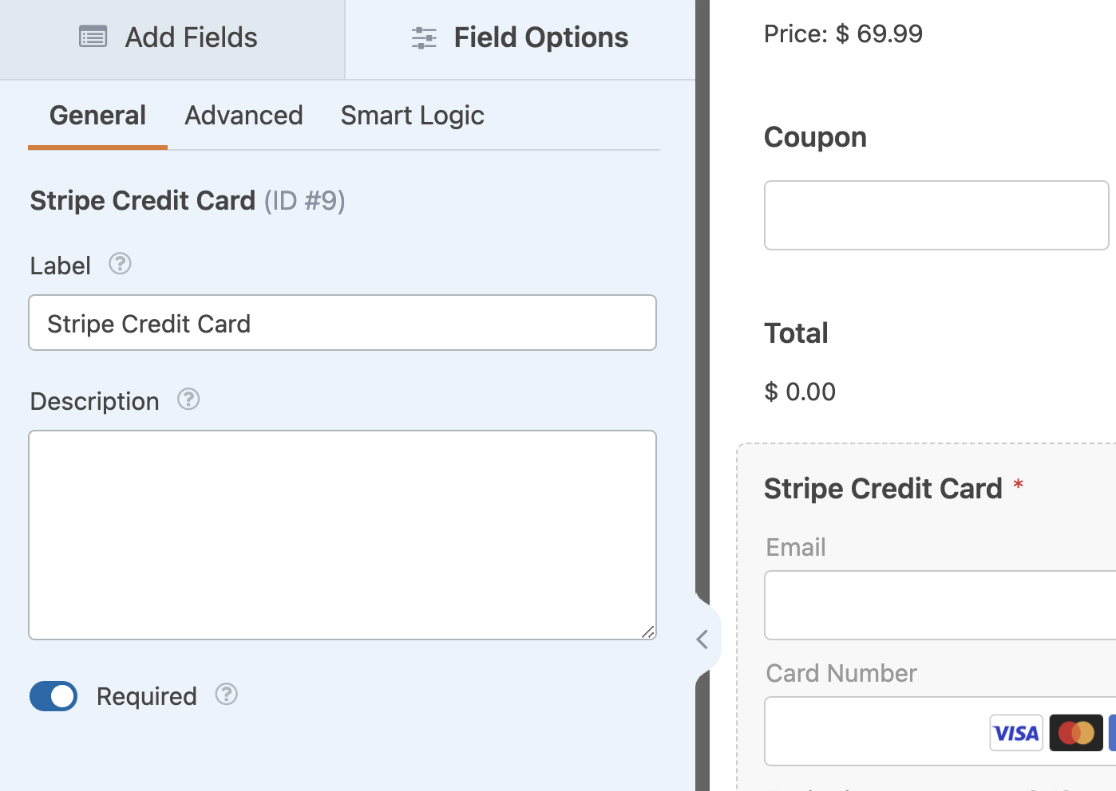
Note: If you’re using the PayPal Standard addon, you can skip the steps below and proceed to test your form to ensure it works properly.
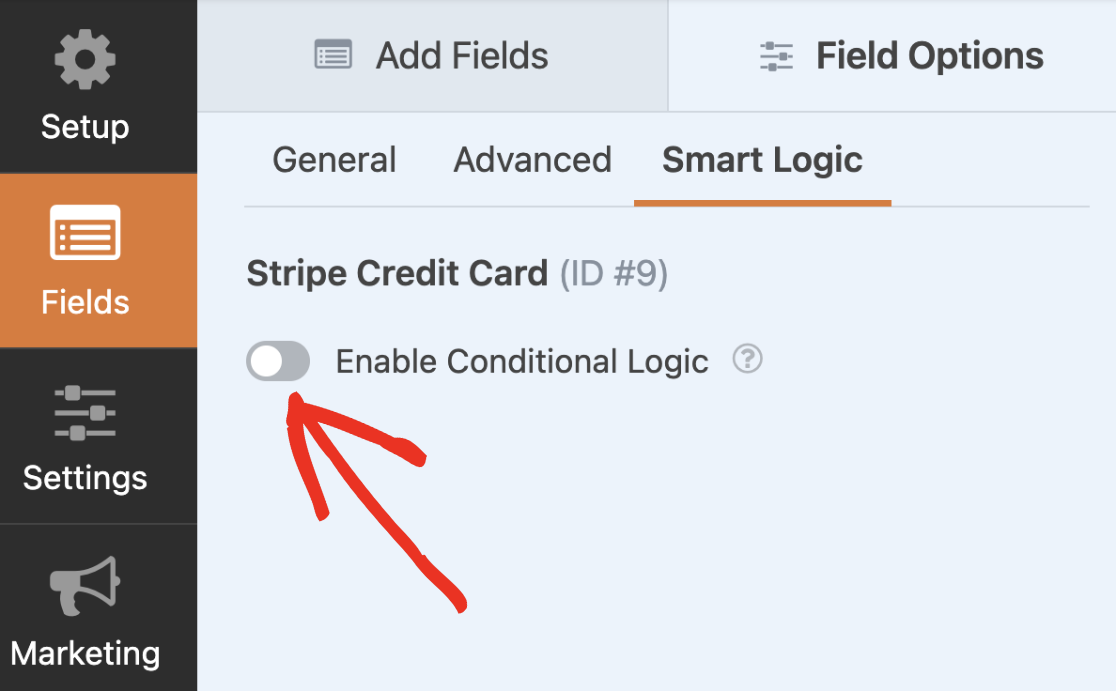
In the Field Options panel, navigate to the Smart Logic tab and toggle on the Enable Conditional Logic option.
Next, set the rule to say: Hide this field if the Coupon field is JULY100OFF. Again remember to replace JULY100OFF with your coupon code.
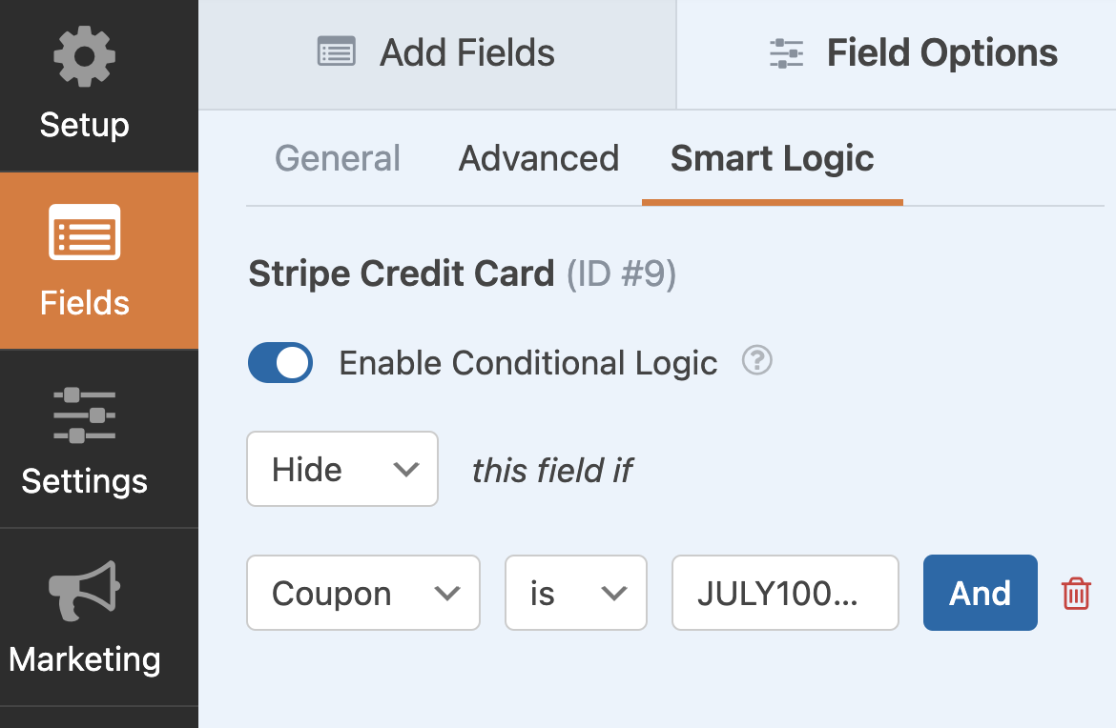
Setting this rule will hide the Stripe Credit Card field if the user enters a coupon code that matches the one you set in the conditional logic rule. This ensures users will be able to submit your form without filling out the required credit card field.
After configuring the conditional logic rule, be sure to save your changes. Once done, we recommend testing your form to ensure everything looks and works as expected.
That’s it! Now you know how to create coupons for any form on your site using the Coupons addon.
Next, wondering how to track and manage the coupons you’ve created for your WordPress forms? Be sure to check out our guide to viewing and managing coupons for more details.
